Context and Introduction
- This article is about basic usage and my learning process. It’s more of an introduction from a practical perspective and not an in-depth exploration of the concepts.
- I want to stick with Docker (so not using the local install method or via pip). For this article, I am trying to avoid writing a custom docker image. (which seems to be the way to go for more serious usage / production)
- I’ve took inspiration from this 2024 guide, so I recommend you read this as well.
Apache Airflow Concepts
Executors
Executors, as the name suggests, determine where and how your tasks are executed. Options range from local execution (LocalExecutor) to distributed execution across multiple machines (CeleryExecutor, KubernetesExecutor).
Tip : use LocalExecutor for DEV
For DEV mode you probably want to have a setup that “fits” into your notebook and do not depend on anything external. It also has the advantage that is multi-threaded so it will use your CPU wisely. This article is focusing on LocalExecutor so it’s important to understand that:
- You will probably need/want to change the docker-compose.yaml to set LocalExecutor ( changing this requires other changes, this will be explained in separate chapter) . The default is “Celery”.
- But after you change that it’s quite important to understand that your code will be running inside the “scheduler” container.
- By knowing this you can then take advantage of using the terminal from Docker Desktop (in windows) to actually run certain commands to validate the “environment” where your Python code is running:
DAG, Task
This is important but i will not make my own definition, you can better read the official docs for DAGs and Tasks
XComs
Definition: XComs (short for “Cross-Communication”) are used in Apache Airflow to allow tasks within a DAG to exchange messages or data. They help in passing small pieces of information (like a variable or status) between tasks, ensuring that the workflow can be dynamic and responsive based on previous task outcomes.
-
XComs are quite limited in size, not meant for large datasets.
-
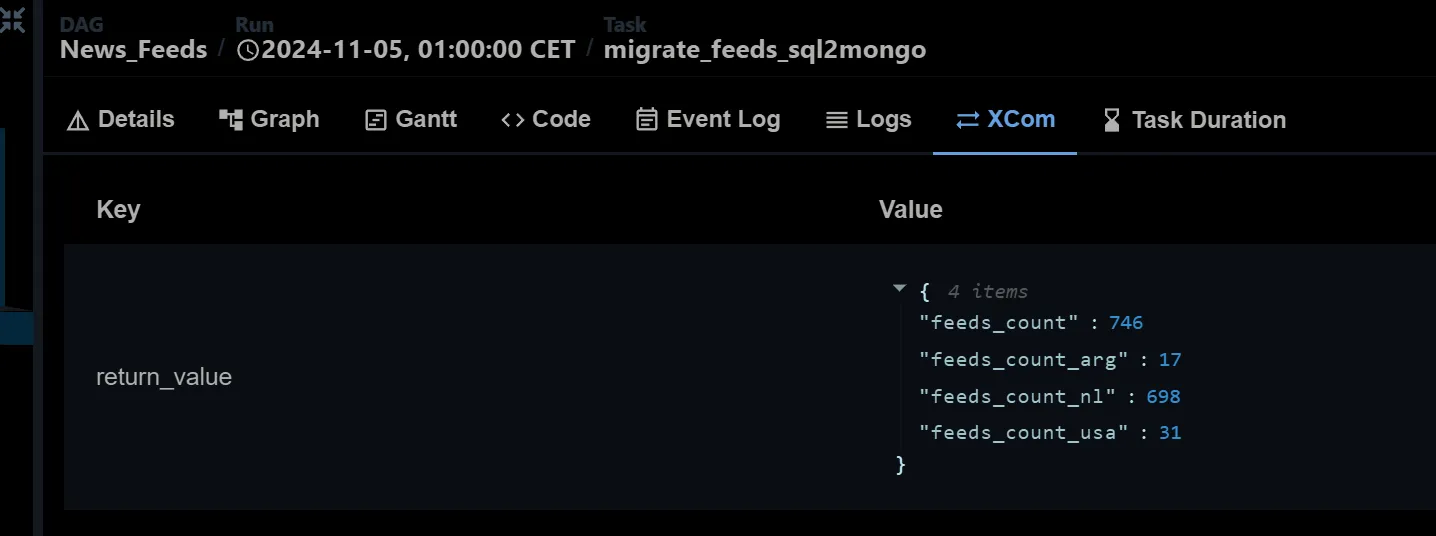
In Apache Airflow, when using the @task decorator from the TaskFlow API, the return value of the decorated function is automatically pushed to XCom with the key return_value. This behavior simplifies inter-task communication by eliminating the need for explicit XCom push commands. I lost some time since most of the docs mention you need to explicit call XCom methods to use it. So be aware of this if you use “decorators” for your dags/tasks as me.
-
Due to this fact it could happen that you start getting error or that the UI becomes really slow.
-
Via the UI you can see returned values from all the Tasks ( and it’s accessible via the XCom API):
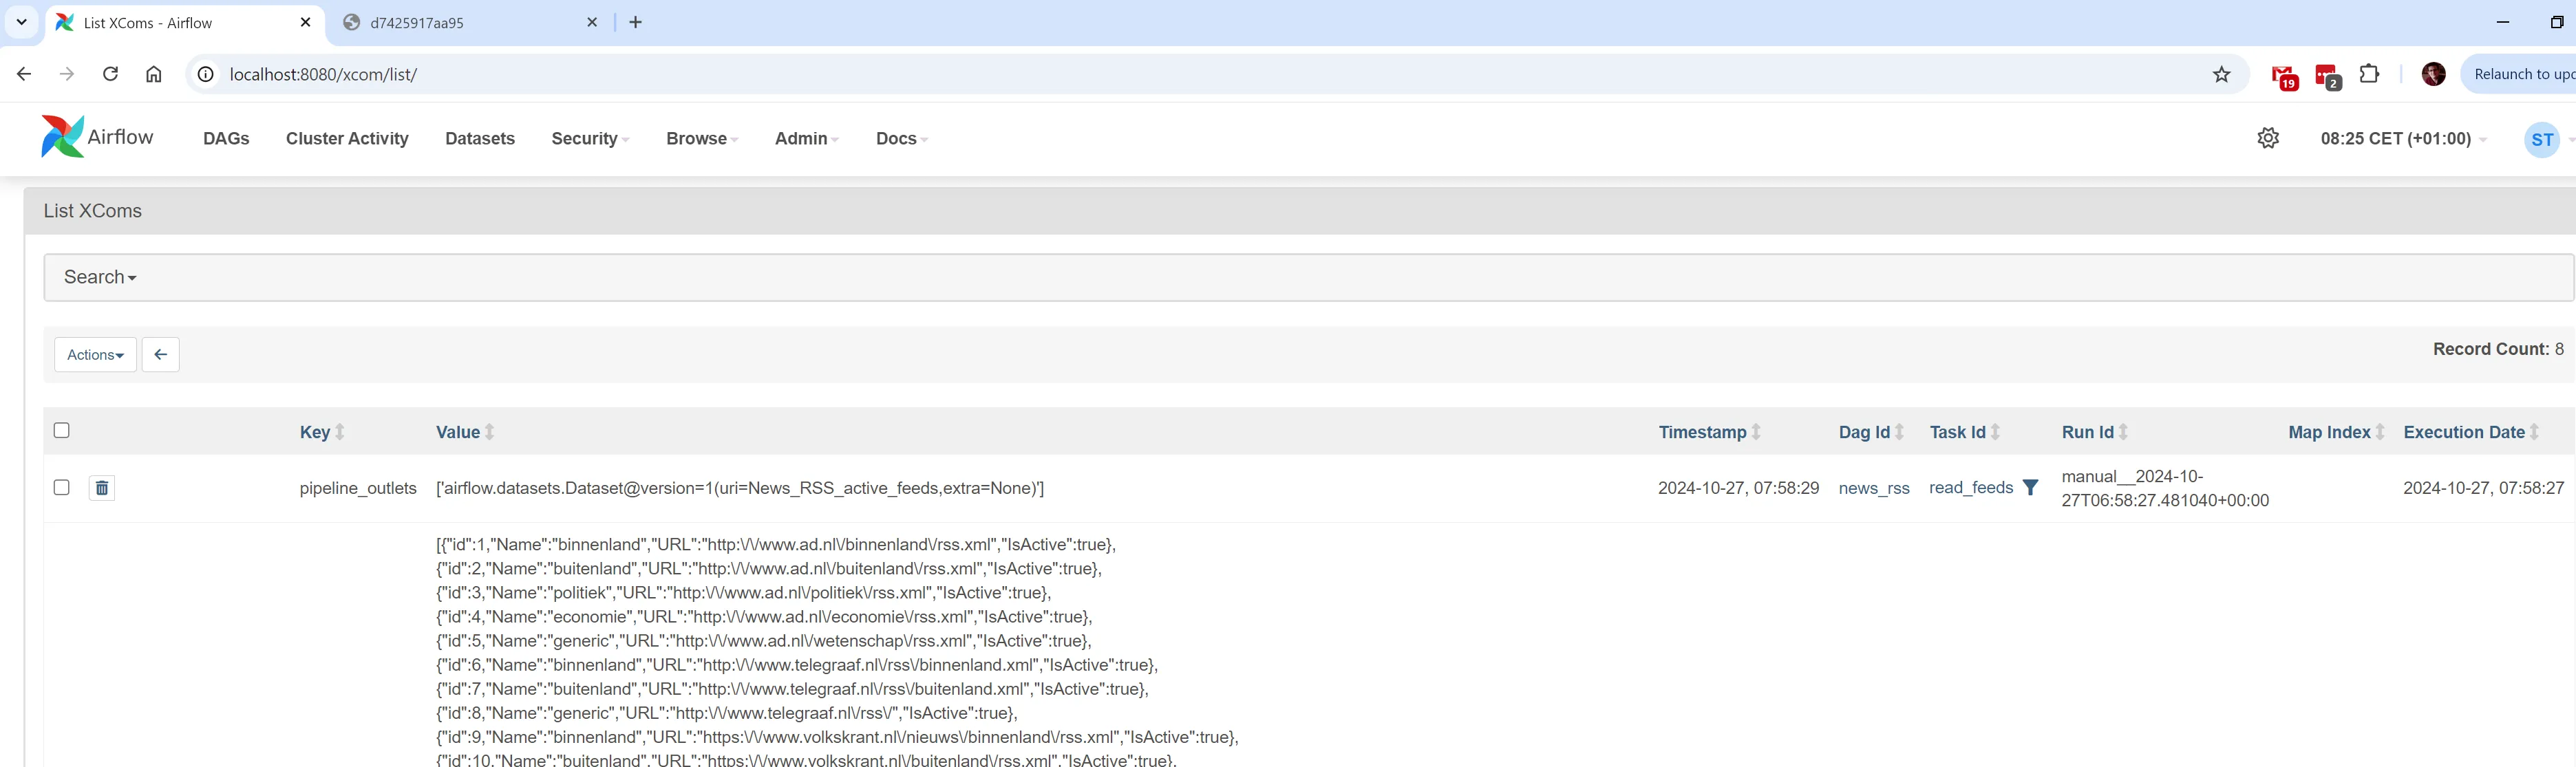
-
In case you need it, you can also turn on XCOM Pickling to serialize complex Python objects (not just JSON-serializable data). In my case, since I was using MongoDB, it always adds and ObjectID which is not serializable. Another option to this problem is off course to have a custom serializer and tread that as a string, will not explain that but both options are possible.
- AIRFLOW__CORE__ENABLE_XCOM_PICKLING=True
Example of an XCom return value via UI for 1 task:
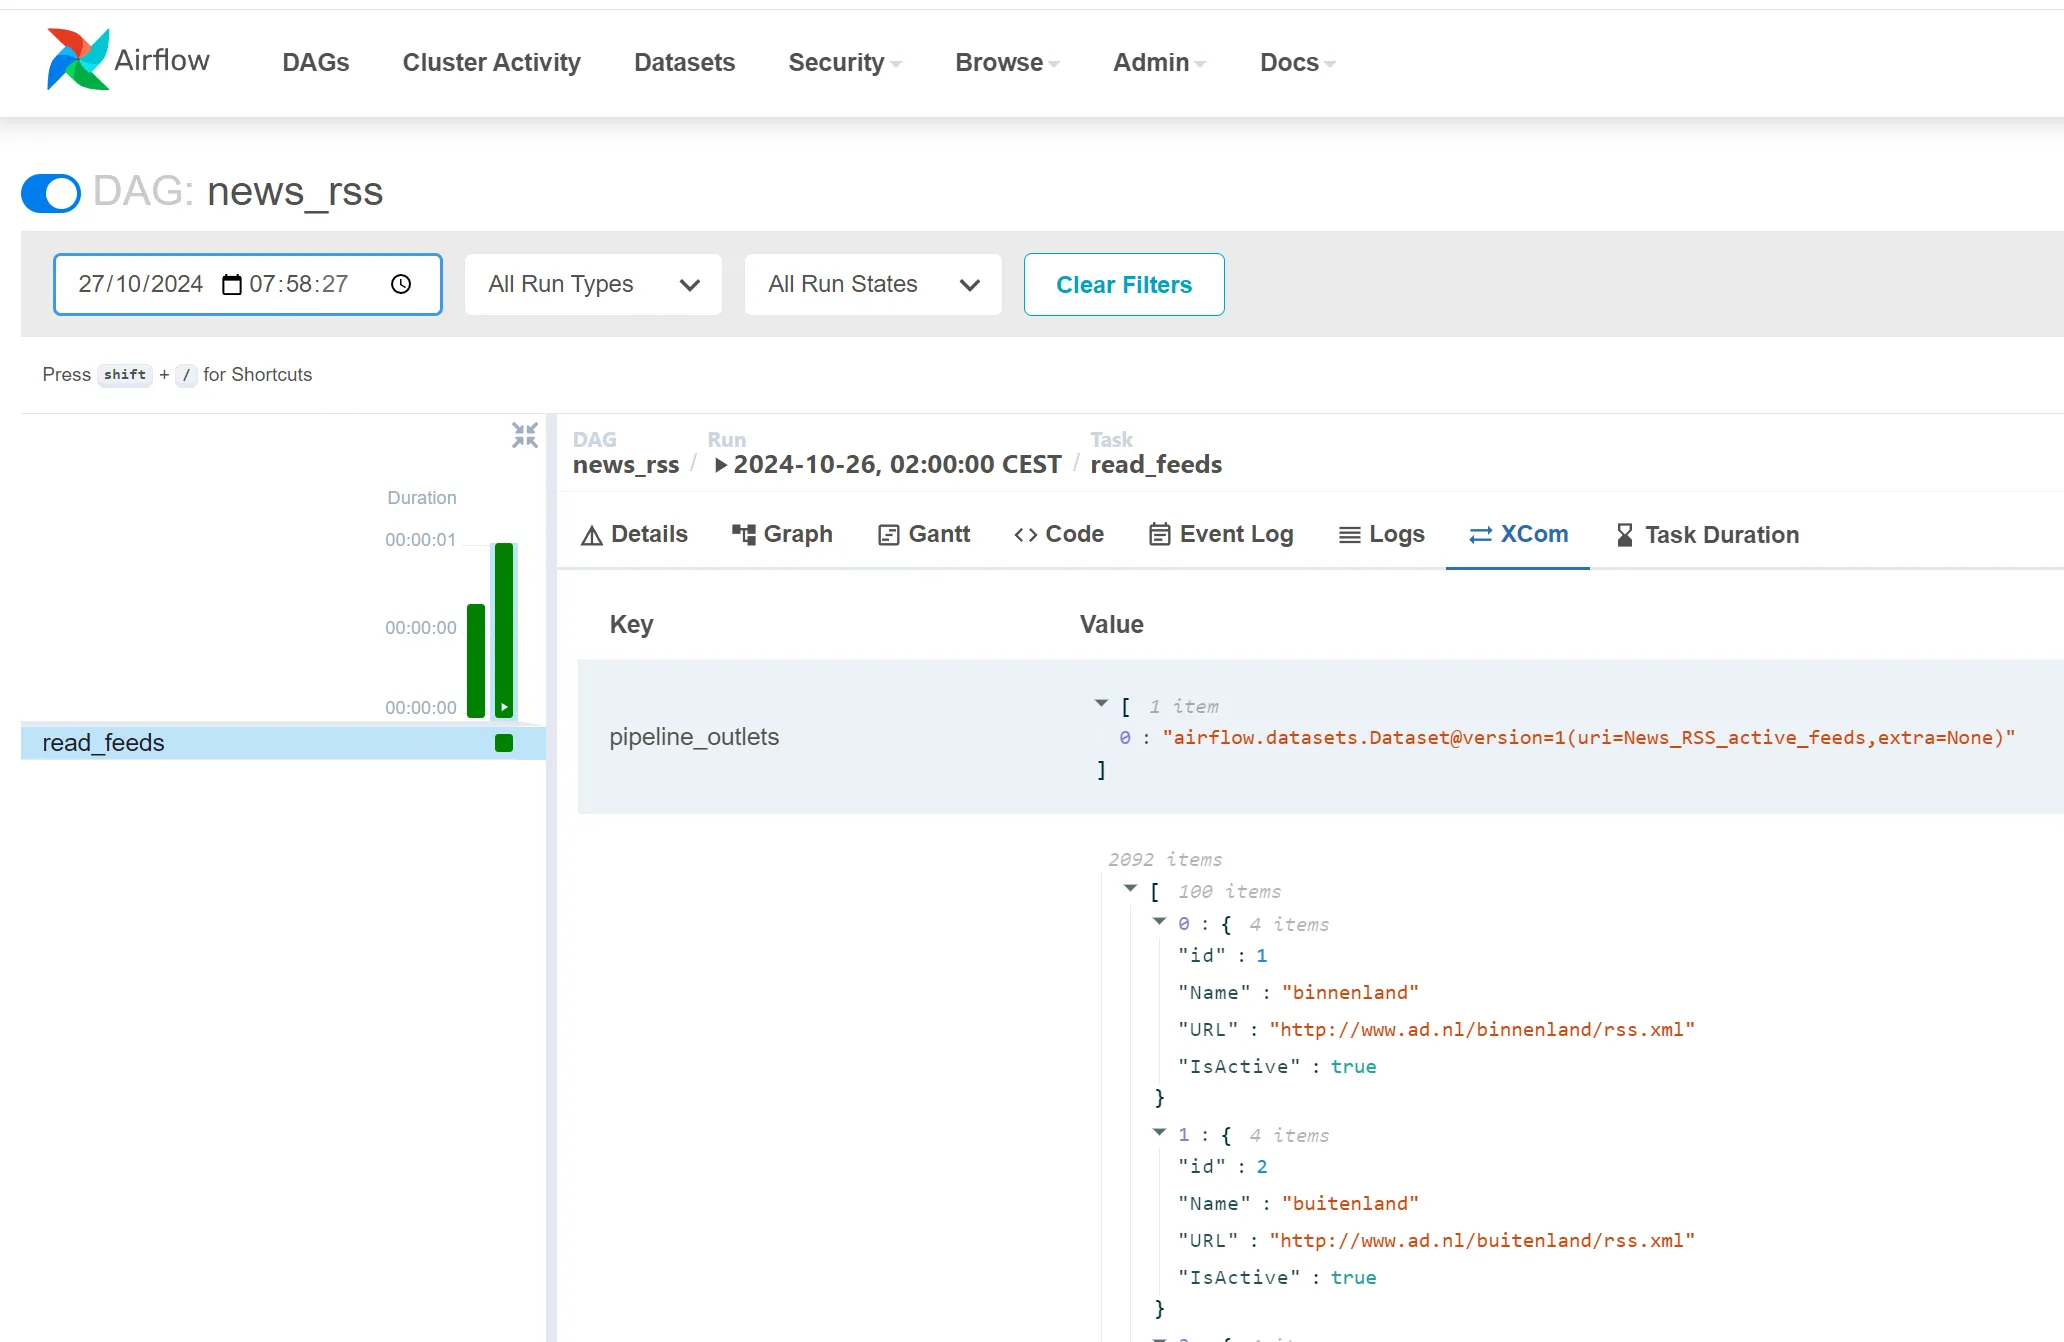
Note: It's quite common to start returning crazy big datasets on each task and this will give you not only error but also very flow UI since it's not meant for that. So, store large datasets in external storage like cloud services (Azure, AWS S3, GCS) or databases.
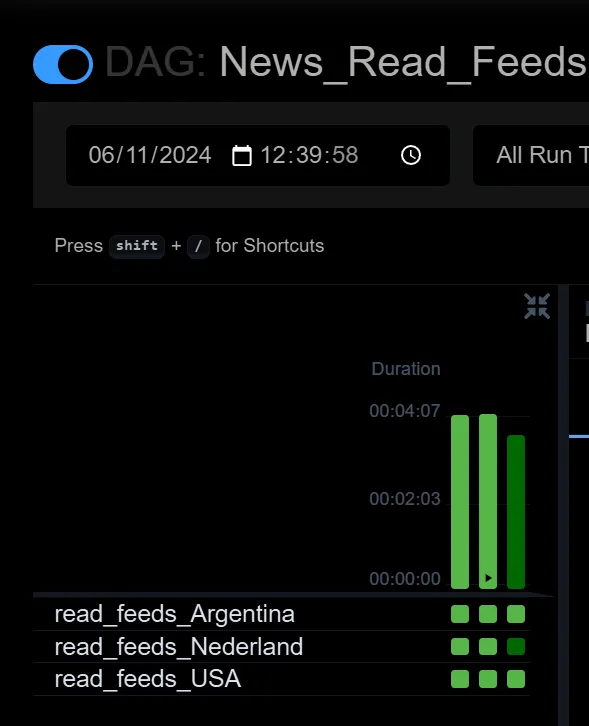
Dynamic tasks
I will write a separate article to go deeper on this topic since its really cool. My use case was that i had a table with “Countries” and i wanted to actually run “separate” tasks for each country without repeating all the code. This reduces code duplication and improves task scalability by dynamically generating task instances based on input parameters.
Dataset
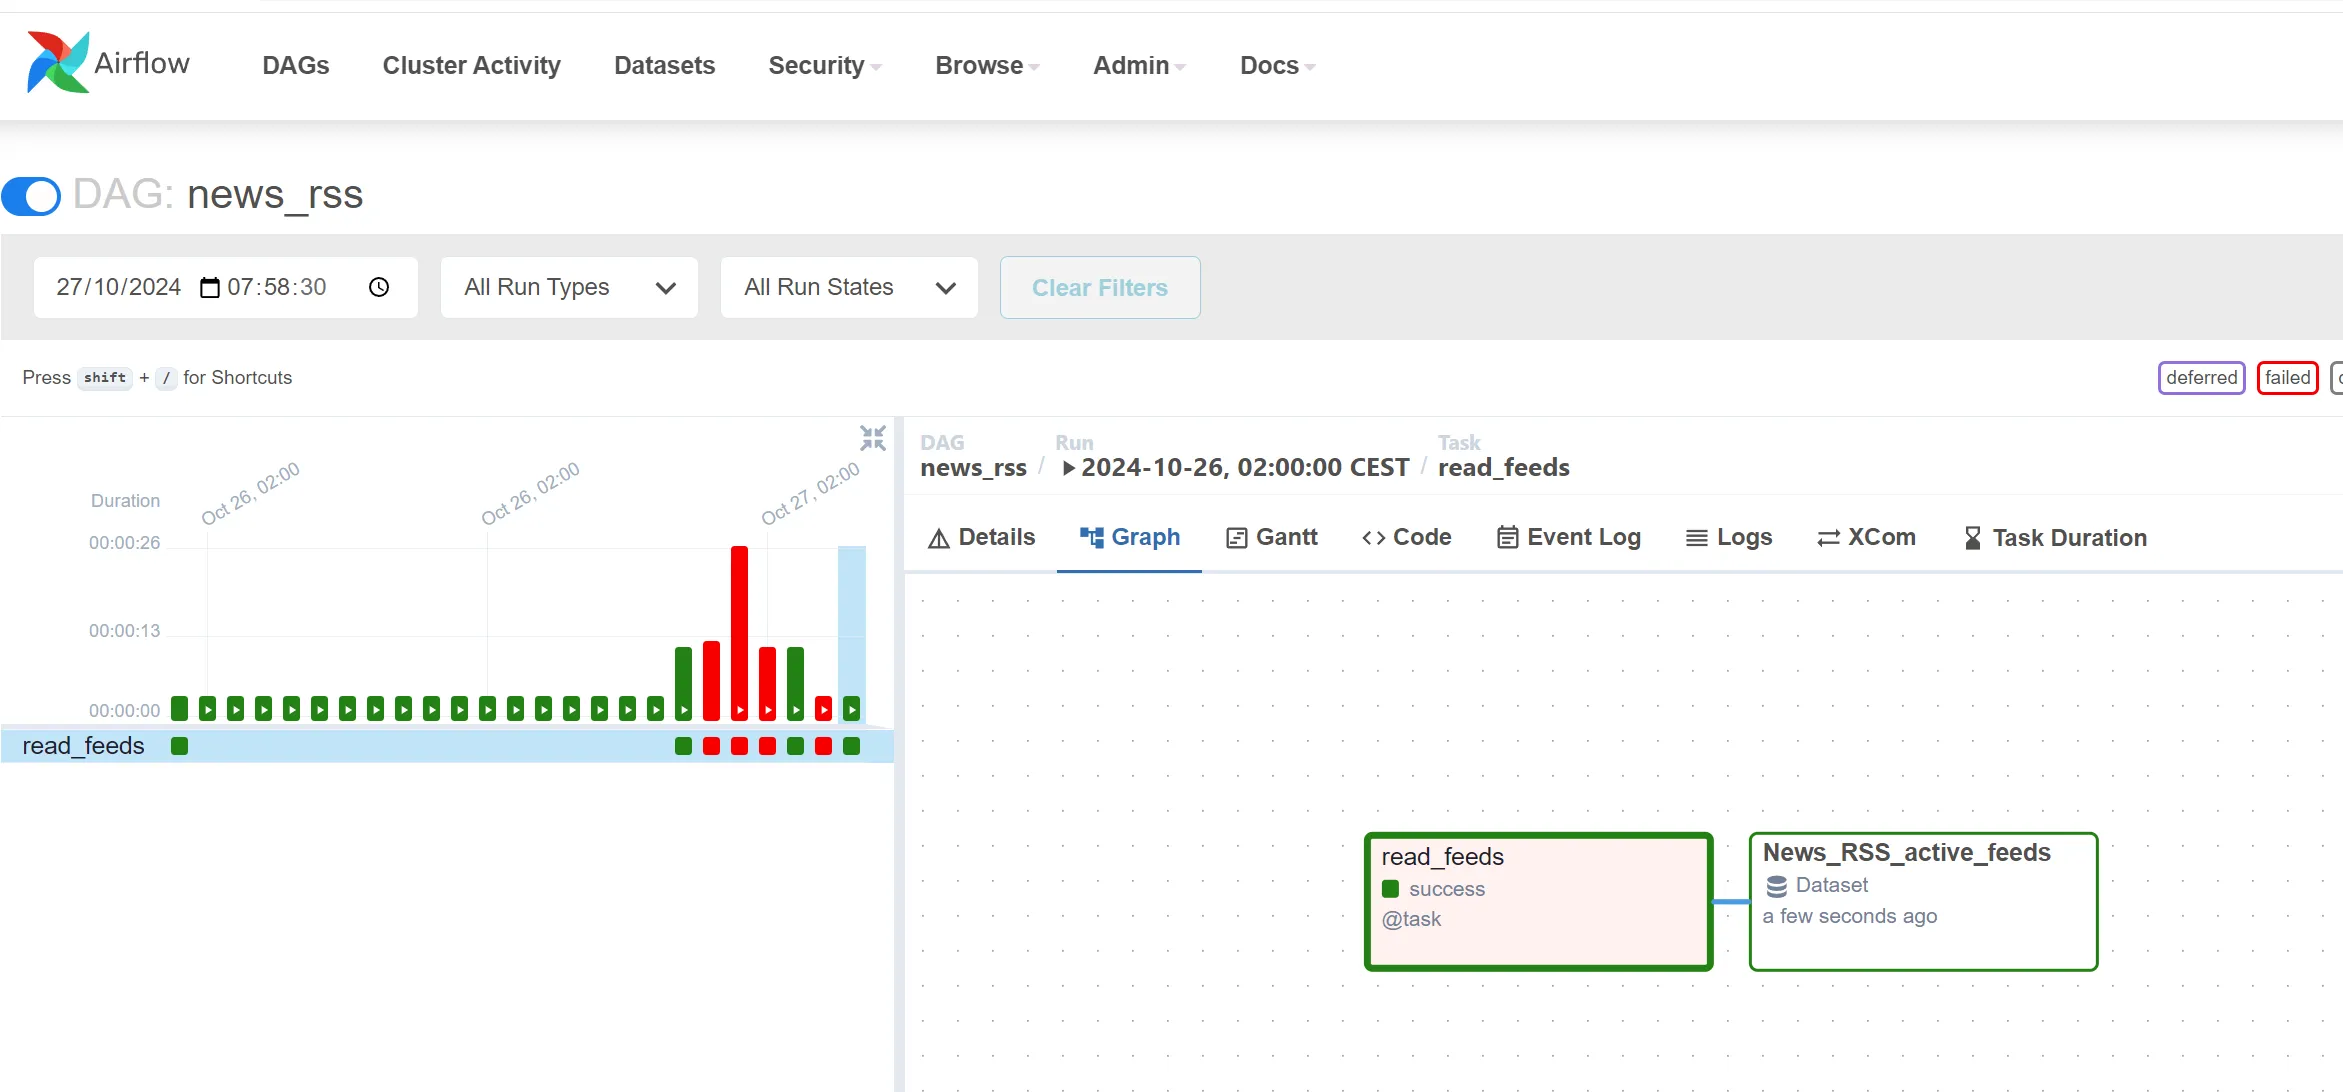
Datasets in Apache Airflow are a structured way to define, track, and manage data dependencies between tasks and DAGs. They represent a specific data entity (e.g., a file, a database table) and allow tasks to explicitly declare their relationship to it, either as a producer (updating/creating the dataset) or a consumer (reading/using the dataset). This improves observability and makes it easier to manage complex data workflows.
What’s nice about this is mainly the traceability and Data Lineage , this gets done basically by:
- Gets treated as a separate entity, which you can view from the UI , independently of the tasks OR from the tasks UI
- You can also see a dependency tree of how used/modified that dataset allowing for Data Lineage
Example: task “produces” a dataset
You need to define you task using “outlets” (producer) and use the dataset content as return value of your function.
    @task(outlets=[Dataset("News_RSS_active_feeds")])
    def read_feeds():
        ...
        return rss_feeds
Practical Guide
Below some practical tips in random order ;)
Share your datasets via storage (Azure Data Lake Storage Gen2)
I found this to be the most practical way to share big datasets. This integrates also very nicely with Azure Fabric ( more to come later )
What i found interesting for the return value then is to have a small json report
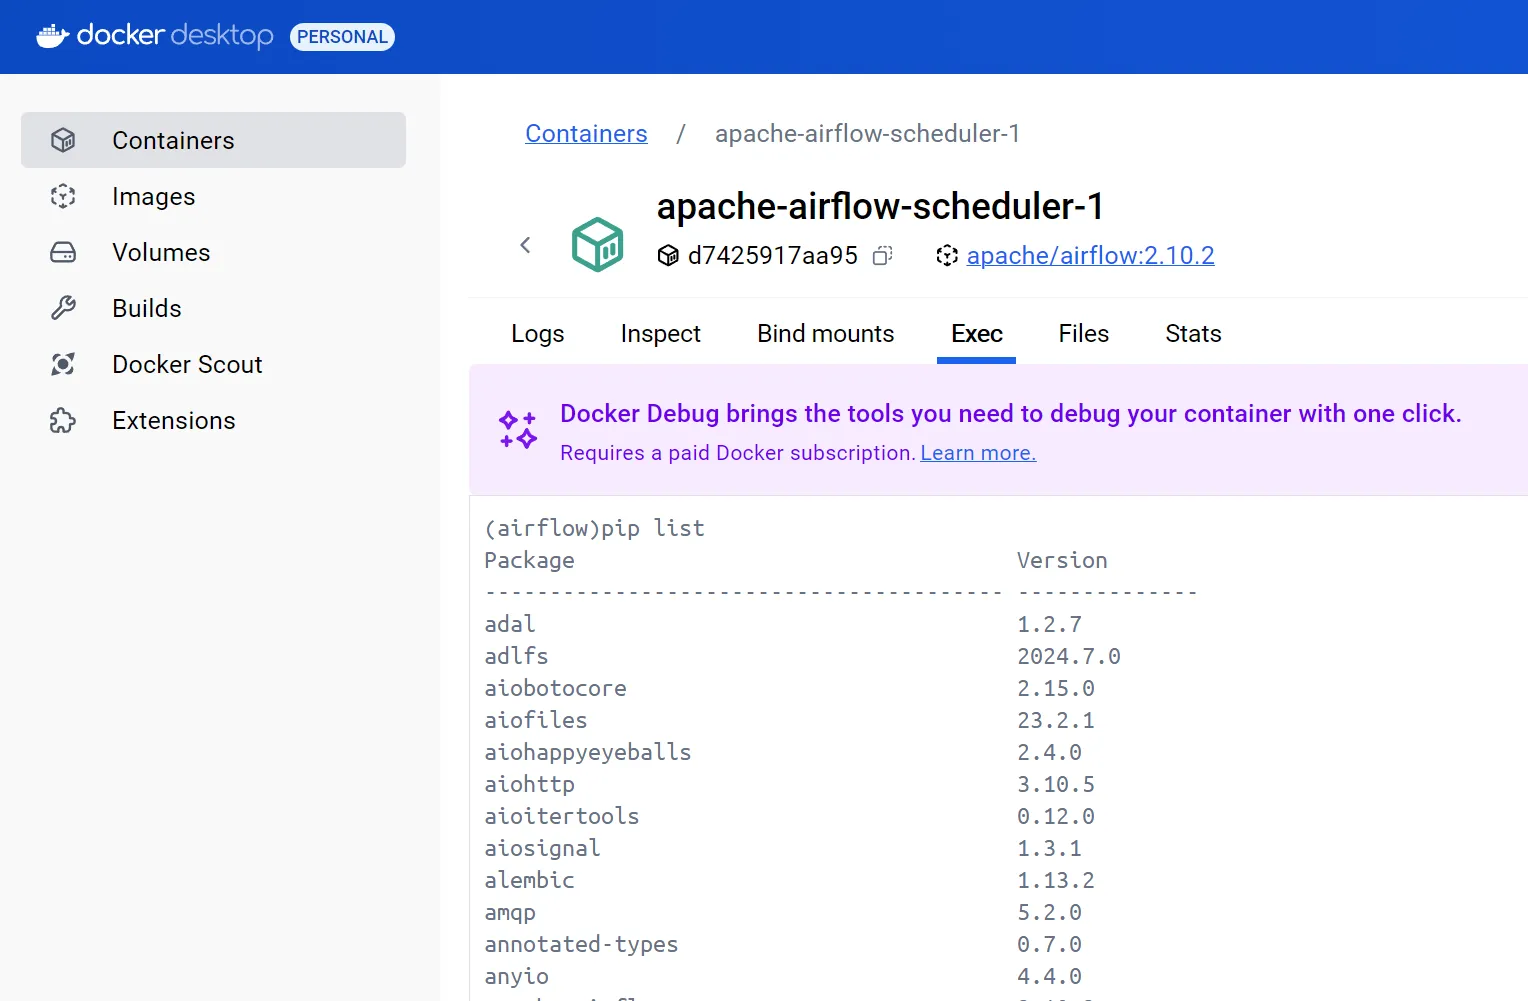
Use the terminal to check/temp install packages
note: if you only want to do a small test and are not really sure about using it, don’t forget you can always connect to the terminal remotely and install install via pip This is obviously a temporal solution, will be lost.
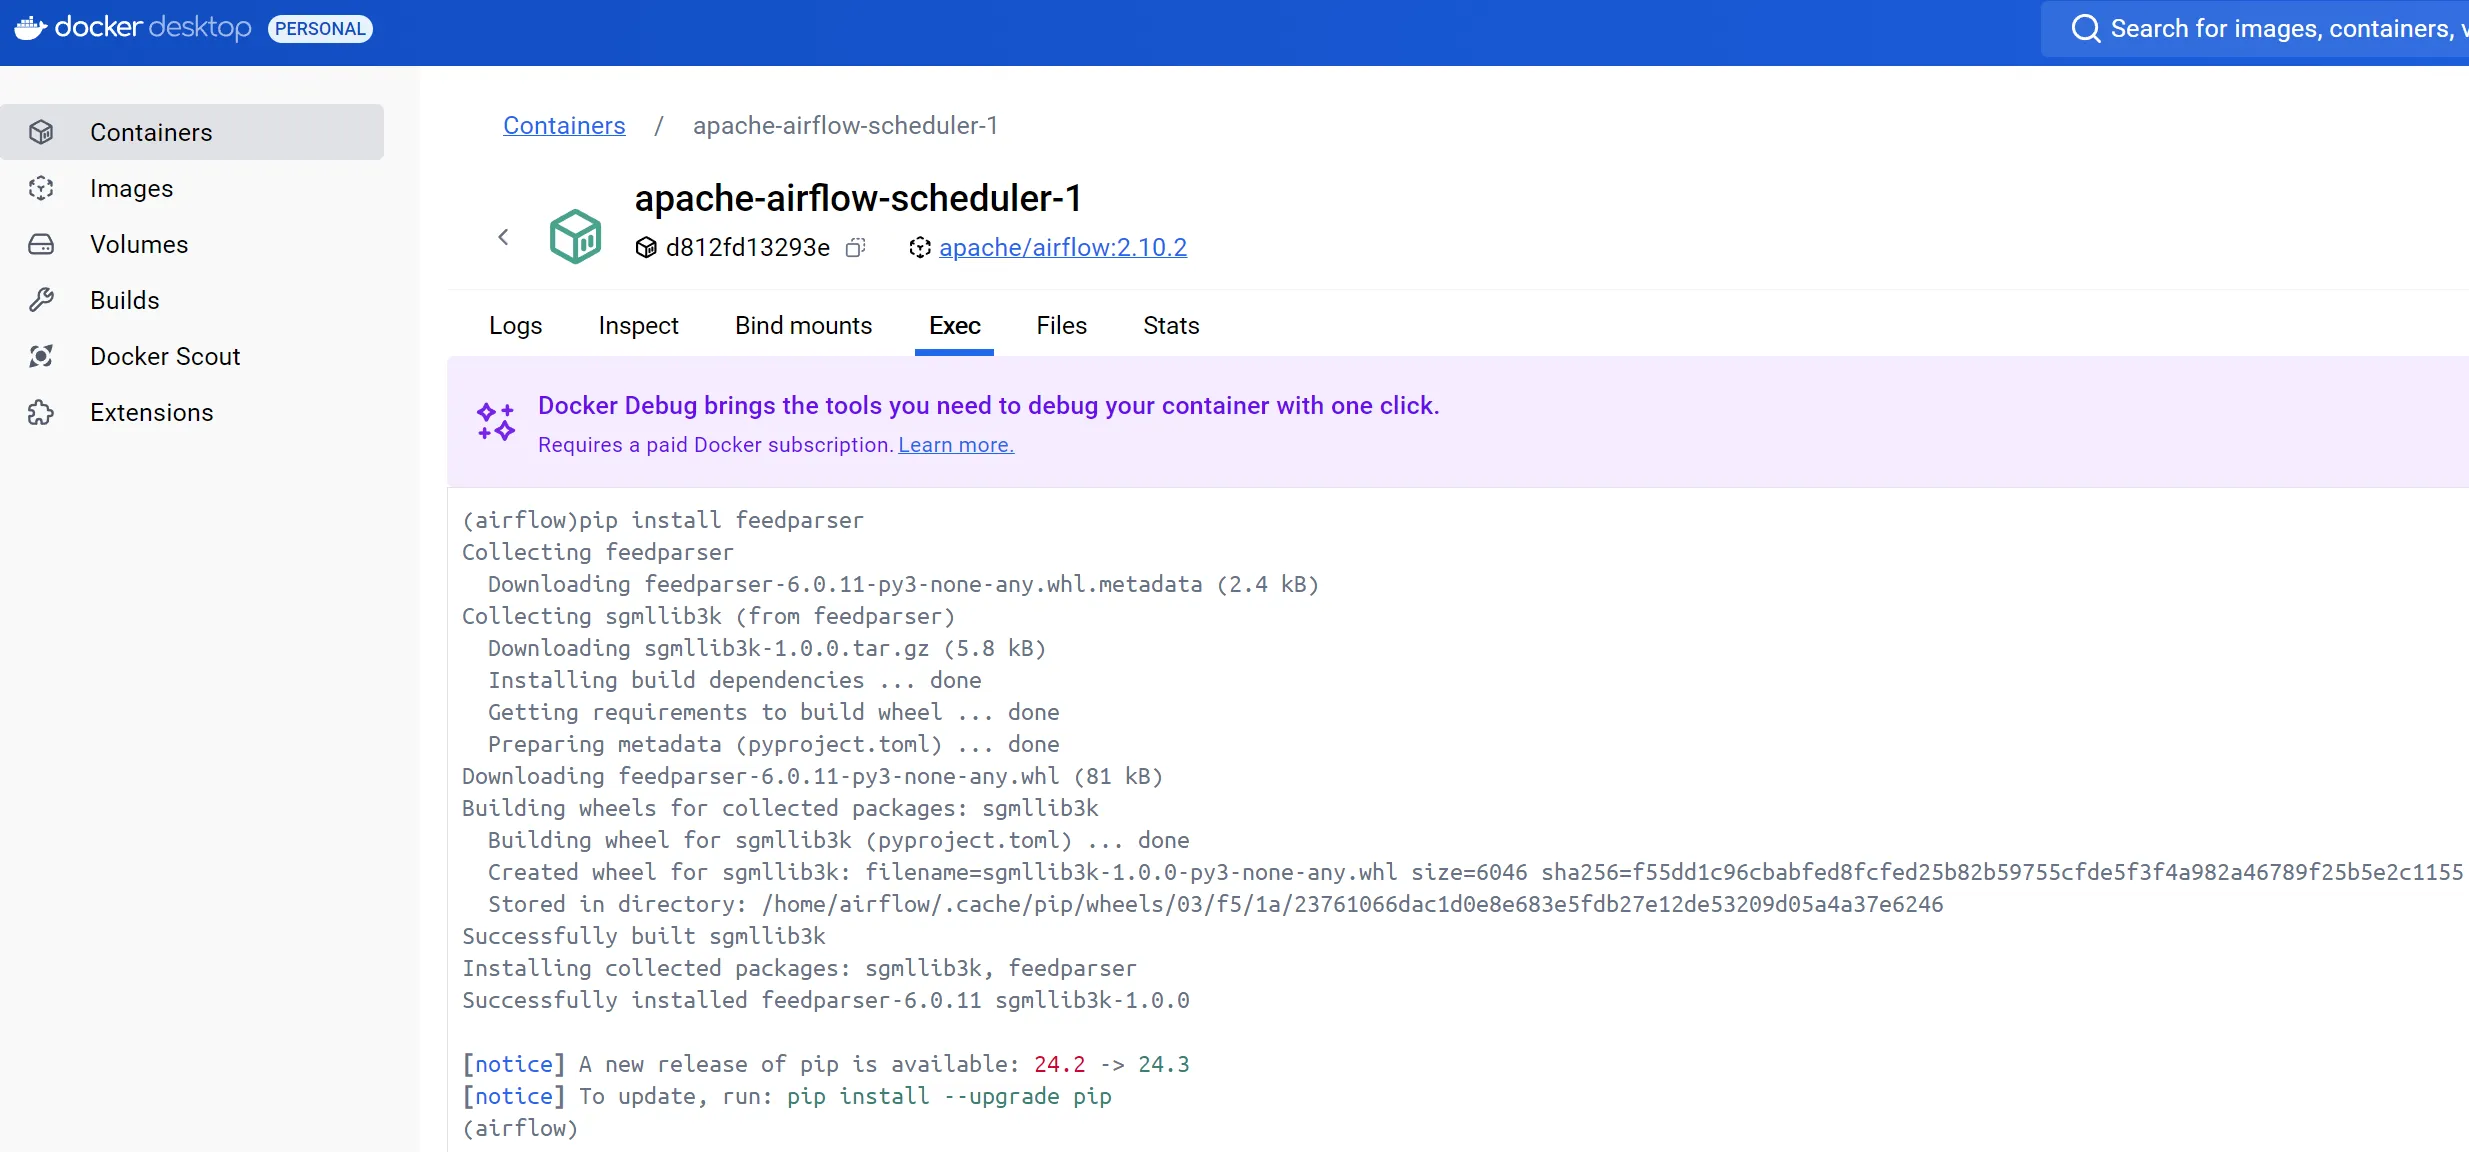
How to install python package when using LocalExecutor?
-
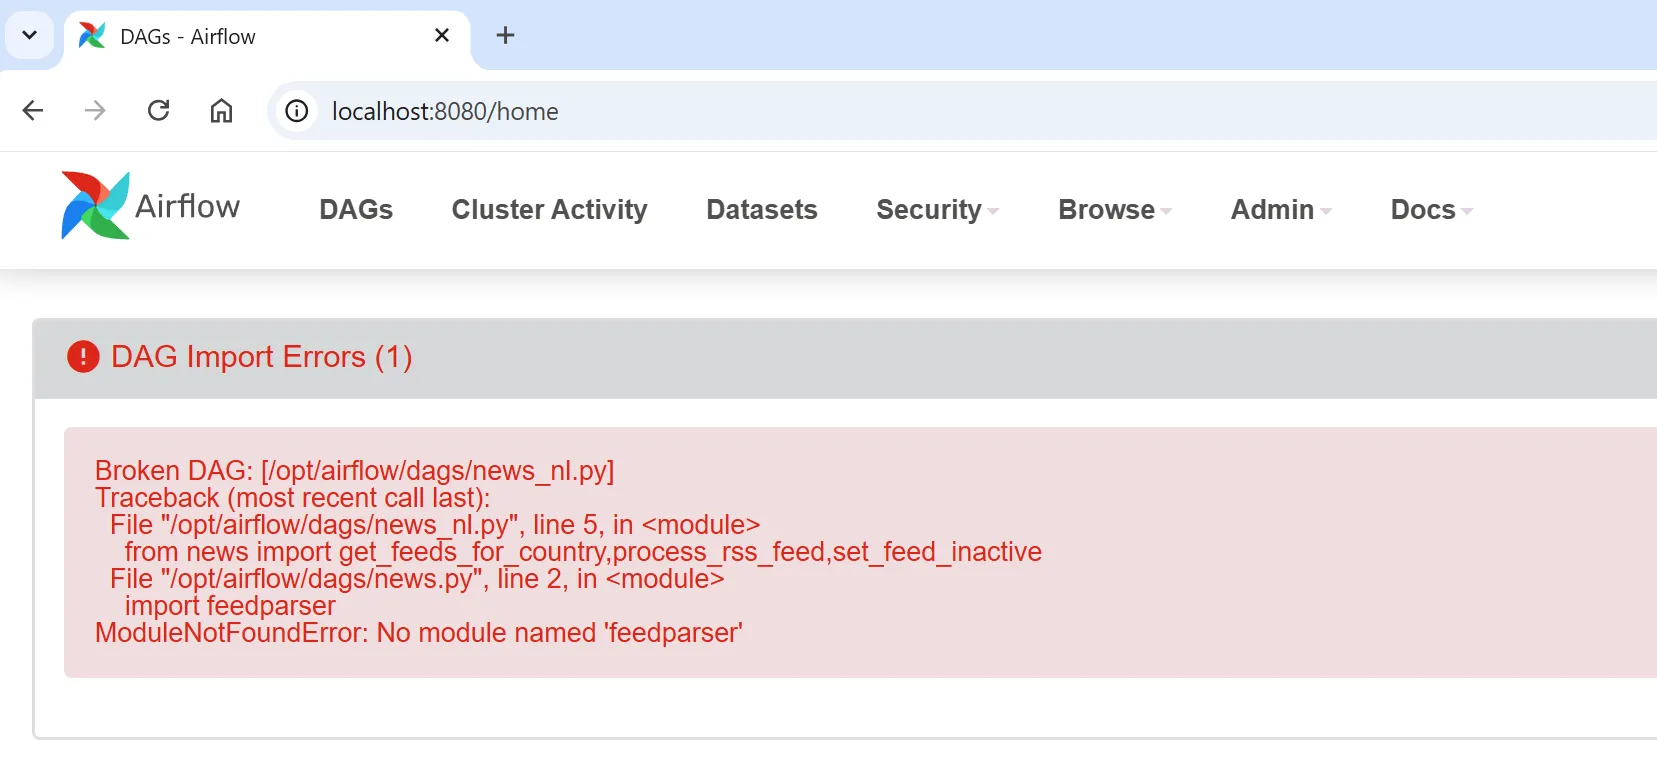
When writting DAGs is quite common to use a python package that it’s not included in the executor (in my case LocalExecutor) , you will see this type of error during DAG import :
-
Clearly this library is missing , so needs to be installed. When you are using the LocalExecutor you code runs on the Scheduler (not on the WebApp), so you need to add there the extra dependency:
  scheduler:
    image: apache/airflow:2.10.2
    restart: always
    environment:
      - AIRFLOW__CORE__EXECUTOR=LocalExecutor
      - AIRFLOW__CORE__SQL_ALCHEMY_CONN=postgresql+psycopg2://{YourUser}:{YourPassword}@postgres/airflow
      - AIRFLOW__CORE__FERNET_KEY="{YourKey}"
      - AIRFLOW__DATASETS__ENABLE_DATASET_AWARE_SCHEDULING=True
      - _PIP_ADDITIONAL_REQUIREMENTS=apache-airflow-providers-mongo feedparser <---- Add it here
    volumes:
      - ./dags:/opt/airflow/dags
      - ./logs:/opt/airflow/logs
      - ./plugins:/opt/airflow/plugins
    depends_on:
      - postgres
    command: "airflow scheduler"
Note: As mentioned in my into, this is going to be slow since it gets install after each restart but perfect for my DEV/test case. In production, it’s better to build a custom Docker image with these dependencies pre-installed to avoid installation overhead
Tip: if odbc driver missing check 1st the ones that are installed
-
In my case, i thought the driver was missing due to an error but actually was a mismatched version between the docker and my local setup

-
So before going ahead and complicate the process check what do you have 1st

Further readings (and final thoughts)
- Official guide for Apache Airflow on Docker
- Ecosystem : Nice page with tons of resources
- YouTube : “Getting Started with Airflow for Beginners”
- Running Airflow 2.0 with Docker in 5 mins : this is more or less what i did, but i modified a lot the docker-compose.yaml to actually focus on DEV ( LocalExecutor)
- Why Airflow ?
- Use the Astro-cli for Apache Airflow.
- In a future article I will check how this can be integrated with Azure Fabric (since they do have some support at least in Data Factory)