Goals
Goals of this post is to show the simple steps to actually create and deploy an Astro web app using Azure Static Web Apps.
Pre-requisites
- You have an Azure subscription active (could be just the free plan)
- Have already a repository containing your Astro website
Steps
Step #1 : Check that your Astro app actually builds
Sounds little stupid but when you are in “dev” mode it’s not really doing any check. So by default you could be uploading initially a version that will not build. The error exposed in the pipelines logs might not be as clear as you want, specially if this is your 1st time.
So make sure you run:
npm run build
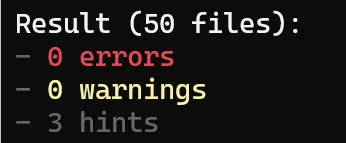
You should check and see no errors:
Step #2 : create Static Web App
- Go to Azure,
- Open Static Web App
- Use the button “Create”
Fill in all the required variables, this is easy, no need to expand on all the details, i will only mention what specifically you need to do for Astro
As mentioned in the intro, the great think about Azure Static Web Apps is that they give a lot of flexibility with their pricing, allowing to host many websites for free:

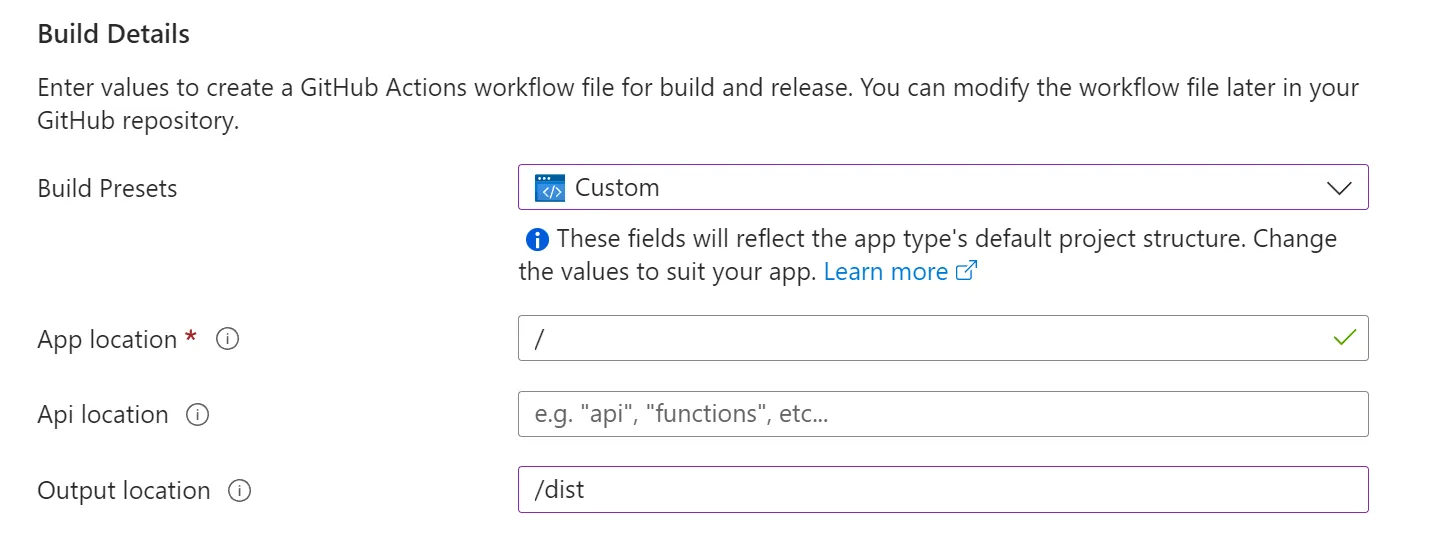
This is the only important setting where you need to pay attention since it’s specific for Astro, since Astro is not listed in the options , you need to set to custom as shown below and also the ‘output location’ needs to be set to /dist since that’s the place where the end HTML’s will be located after a build:
Step #3 : Checks
- The creation will add files into your repo for the GitHub Actions workflow (yaml) pipeline. You can also preview the content directly before the creation using the “Preview workflow file”
- The new resource / created app will expose an overview page with important URLs for you to check immediately after creation:
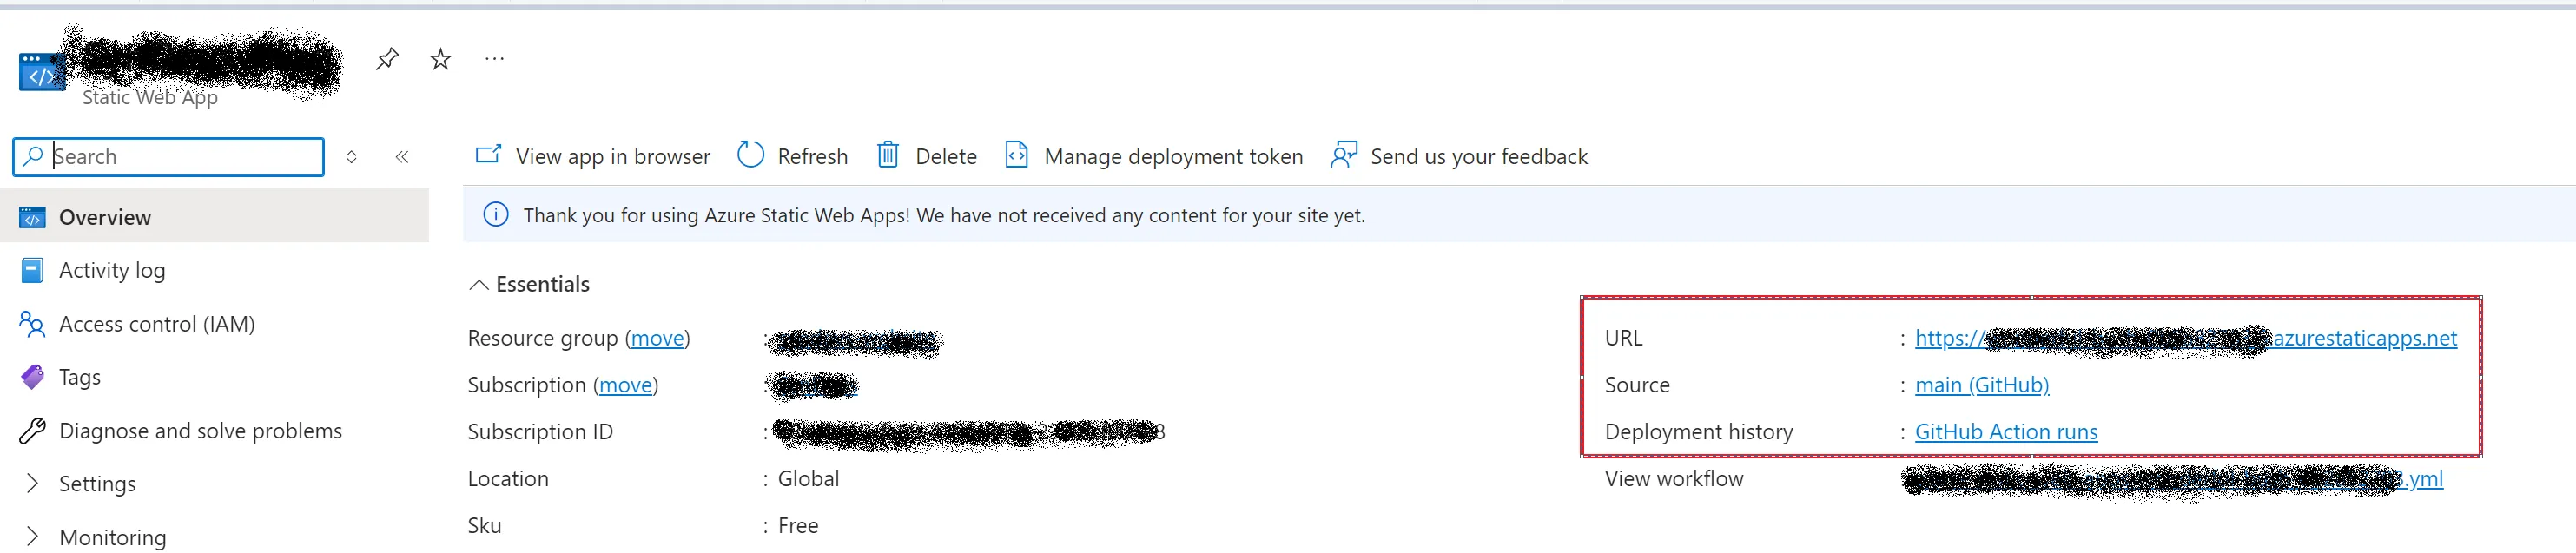
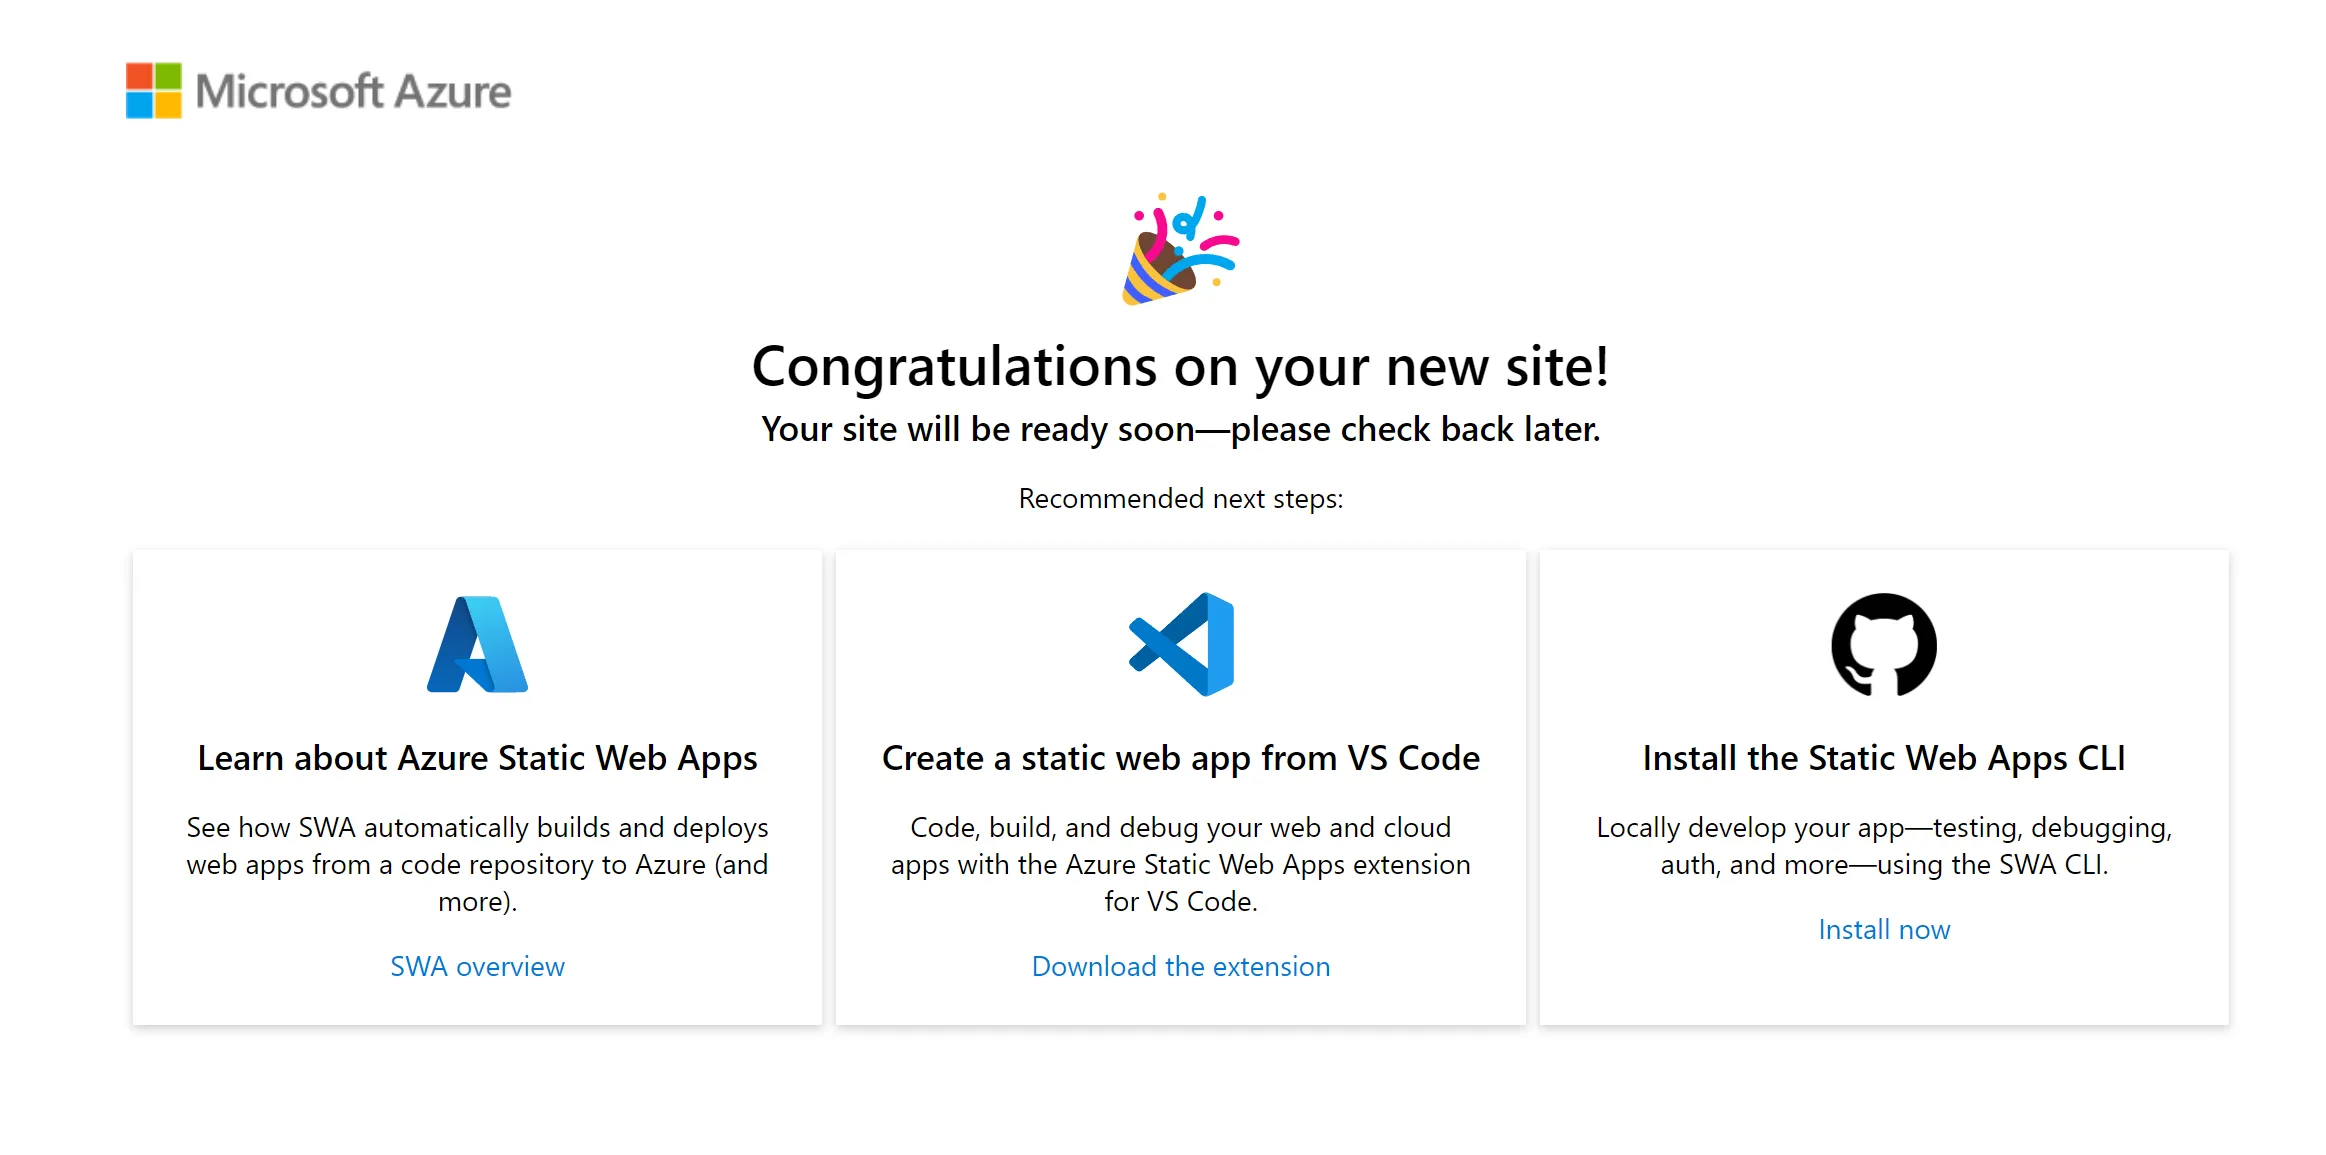
I would suggest that you immediately go to the “URL” , which is auto-generated for you. If you open this too fast, you will see this instead of your content.
 The reason is that your website is still building in the GitHub Actions, so open that other URL 1st (“Deployment History”) :