As a developer, there are countless combinations available for building AI agents. From a wide array of agent frameworks to the temptation of using big-tech proprietary solutions, the choices can be overwhelming. My goal was to find a combination that truly fits the needs I’ve encountered in real projects. After several experiments, I found that this particular stack works remarkably well.
Build Smart Agents with Docker MCP Server & PydanticAI
Building intelligent agents is easier and faster than ever by combining the power of the MCP Toolkit for Docker Desktop with the flexibility of PydanticAI. This article provides a concise, high-quality guide to get you started quickly.
Definitions
What is the MCP Toolkit?
The Docker MCP Toolkit is a built-in feature of Docker Desktop that enables seamless setup, management, and execution of containerized MCP servers and their connections to AI agents. It removes friction from tool usage by offering secure defaults, one-click setup, and support for a growing ecosystem of LLM-based clients. Key features include:
- Cross-LLM compatibility: Instantly works with tools like Claude Desktop, Cursor.
- Integrated tool discovery: Browse and launch MCP servers from the Docker MCP Catalog directly in Docker Desktop.
- Zero manual setup: No dependency management, runtime configuration, or server setup required.
- Security: Image signing, resource limits, and strict access controls.
- Gateway functionality: Aggregates MCP servers and acts as a gateway for clients.
Why Use the MCP Toolkit?
- Visual Management: Browse, start, and configure MCP servers and agents with a click.
- Rapid Prototyping: Quickly connect agents to popular platforms and APIs.
- Portability & Isolation: Leverage Docker’s containerization for reproducible environments.
- Security: All official MCP server images are signed and resource-limited for safety.
What is PydanticAI?
PydanticAI is a Python framework that combines AI agent capabilities with Pydantic’s powerful data validation and type management system. It provides a structured approach to building robust AI applications by:
- Defining type-safe schemas for agent inputs and outputs
- Validating data automatically to catch errors early
- Streamlining the integration of AI models with Python workflows
- Enabling function tool calling to let agents request information and perform actions
- Supporting Model Context Protocol (MCP) servers for standardized connections to external tools and services
- Ensuring reliable data handling throughout your AI pipeline
This simplifies developing and maintaining robust, production-ready AI agents characterized by predictable behavior, strong data integrity, ease of integration, and a highly extensible ecosystem of tools and services.
Quickstart
This article assumes you have already Docker Desktop installed and using latest version. The MCP Toolkit was a Beta feature a month ago.
1. Enable the MCP Toolkit
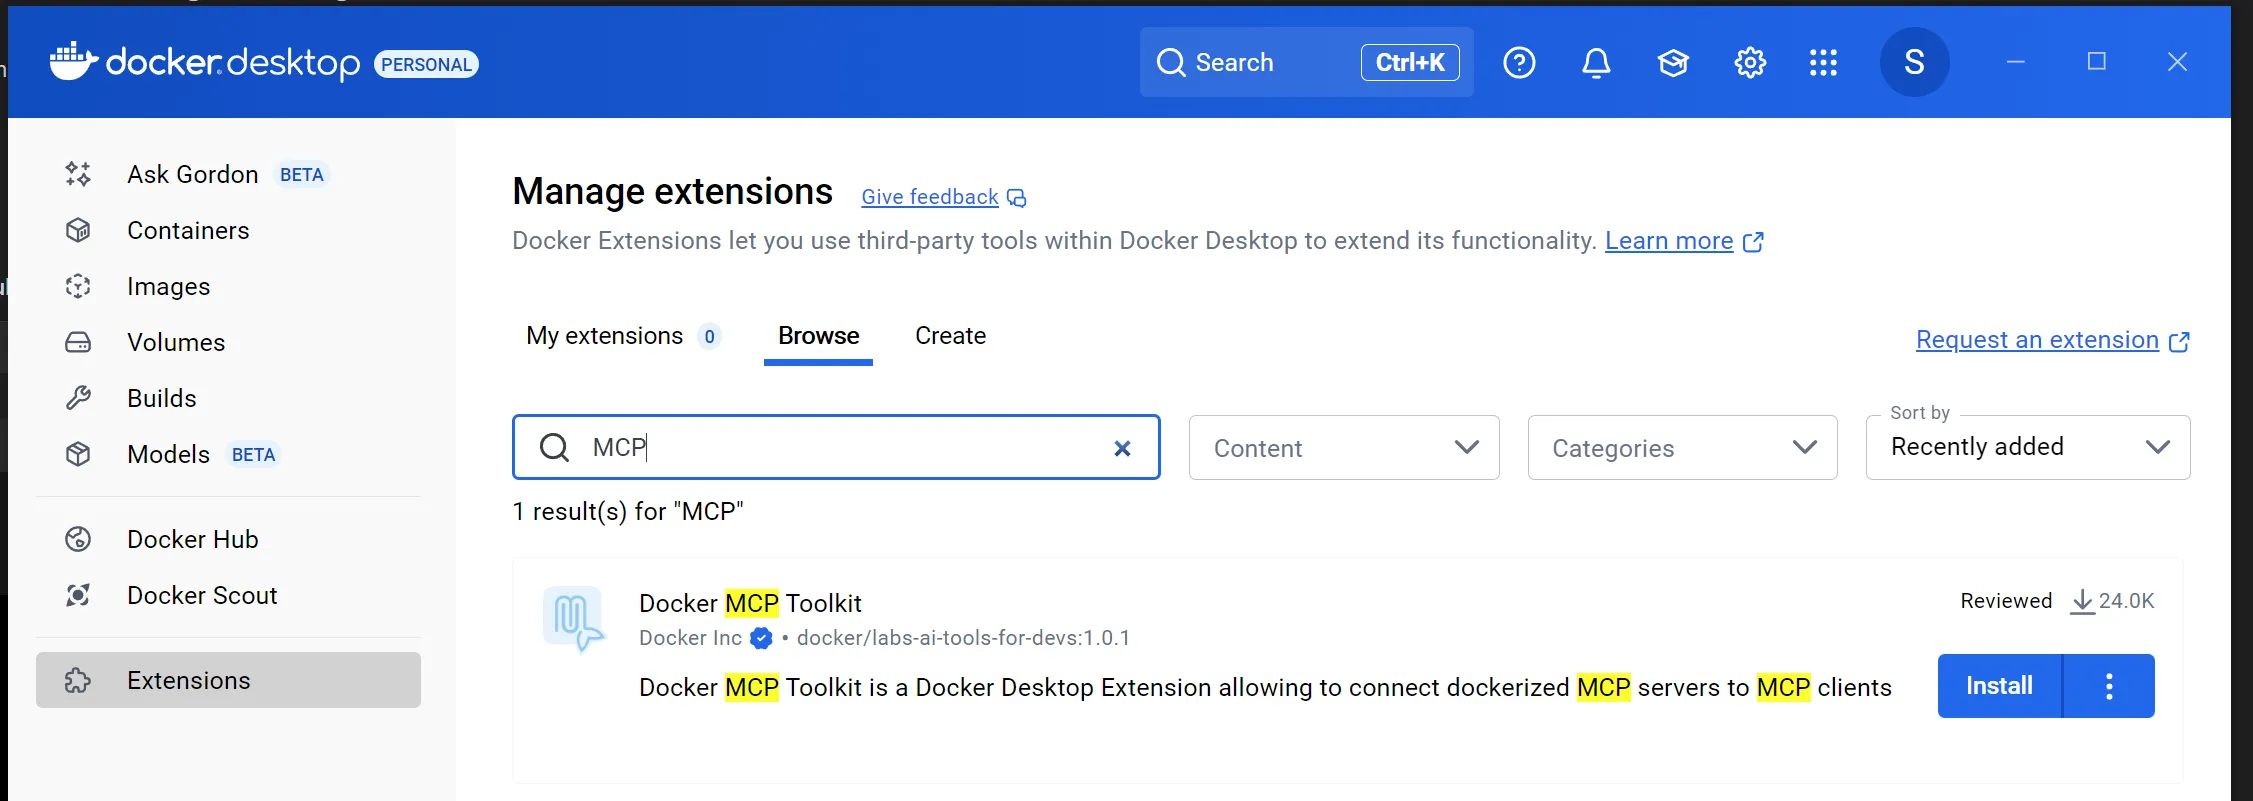
- Open Docker Desktop and go to “Extensions”
- Search and install Docker MCP Toolkit
2. Install an MCP Server
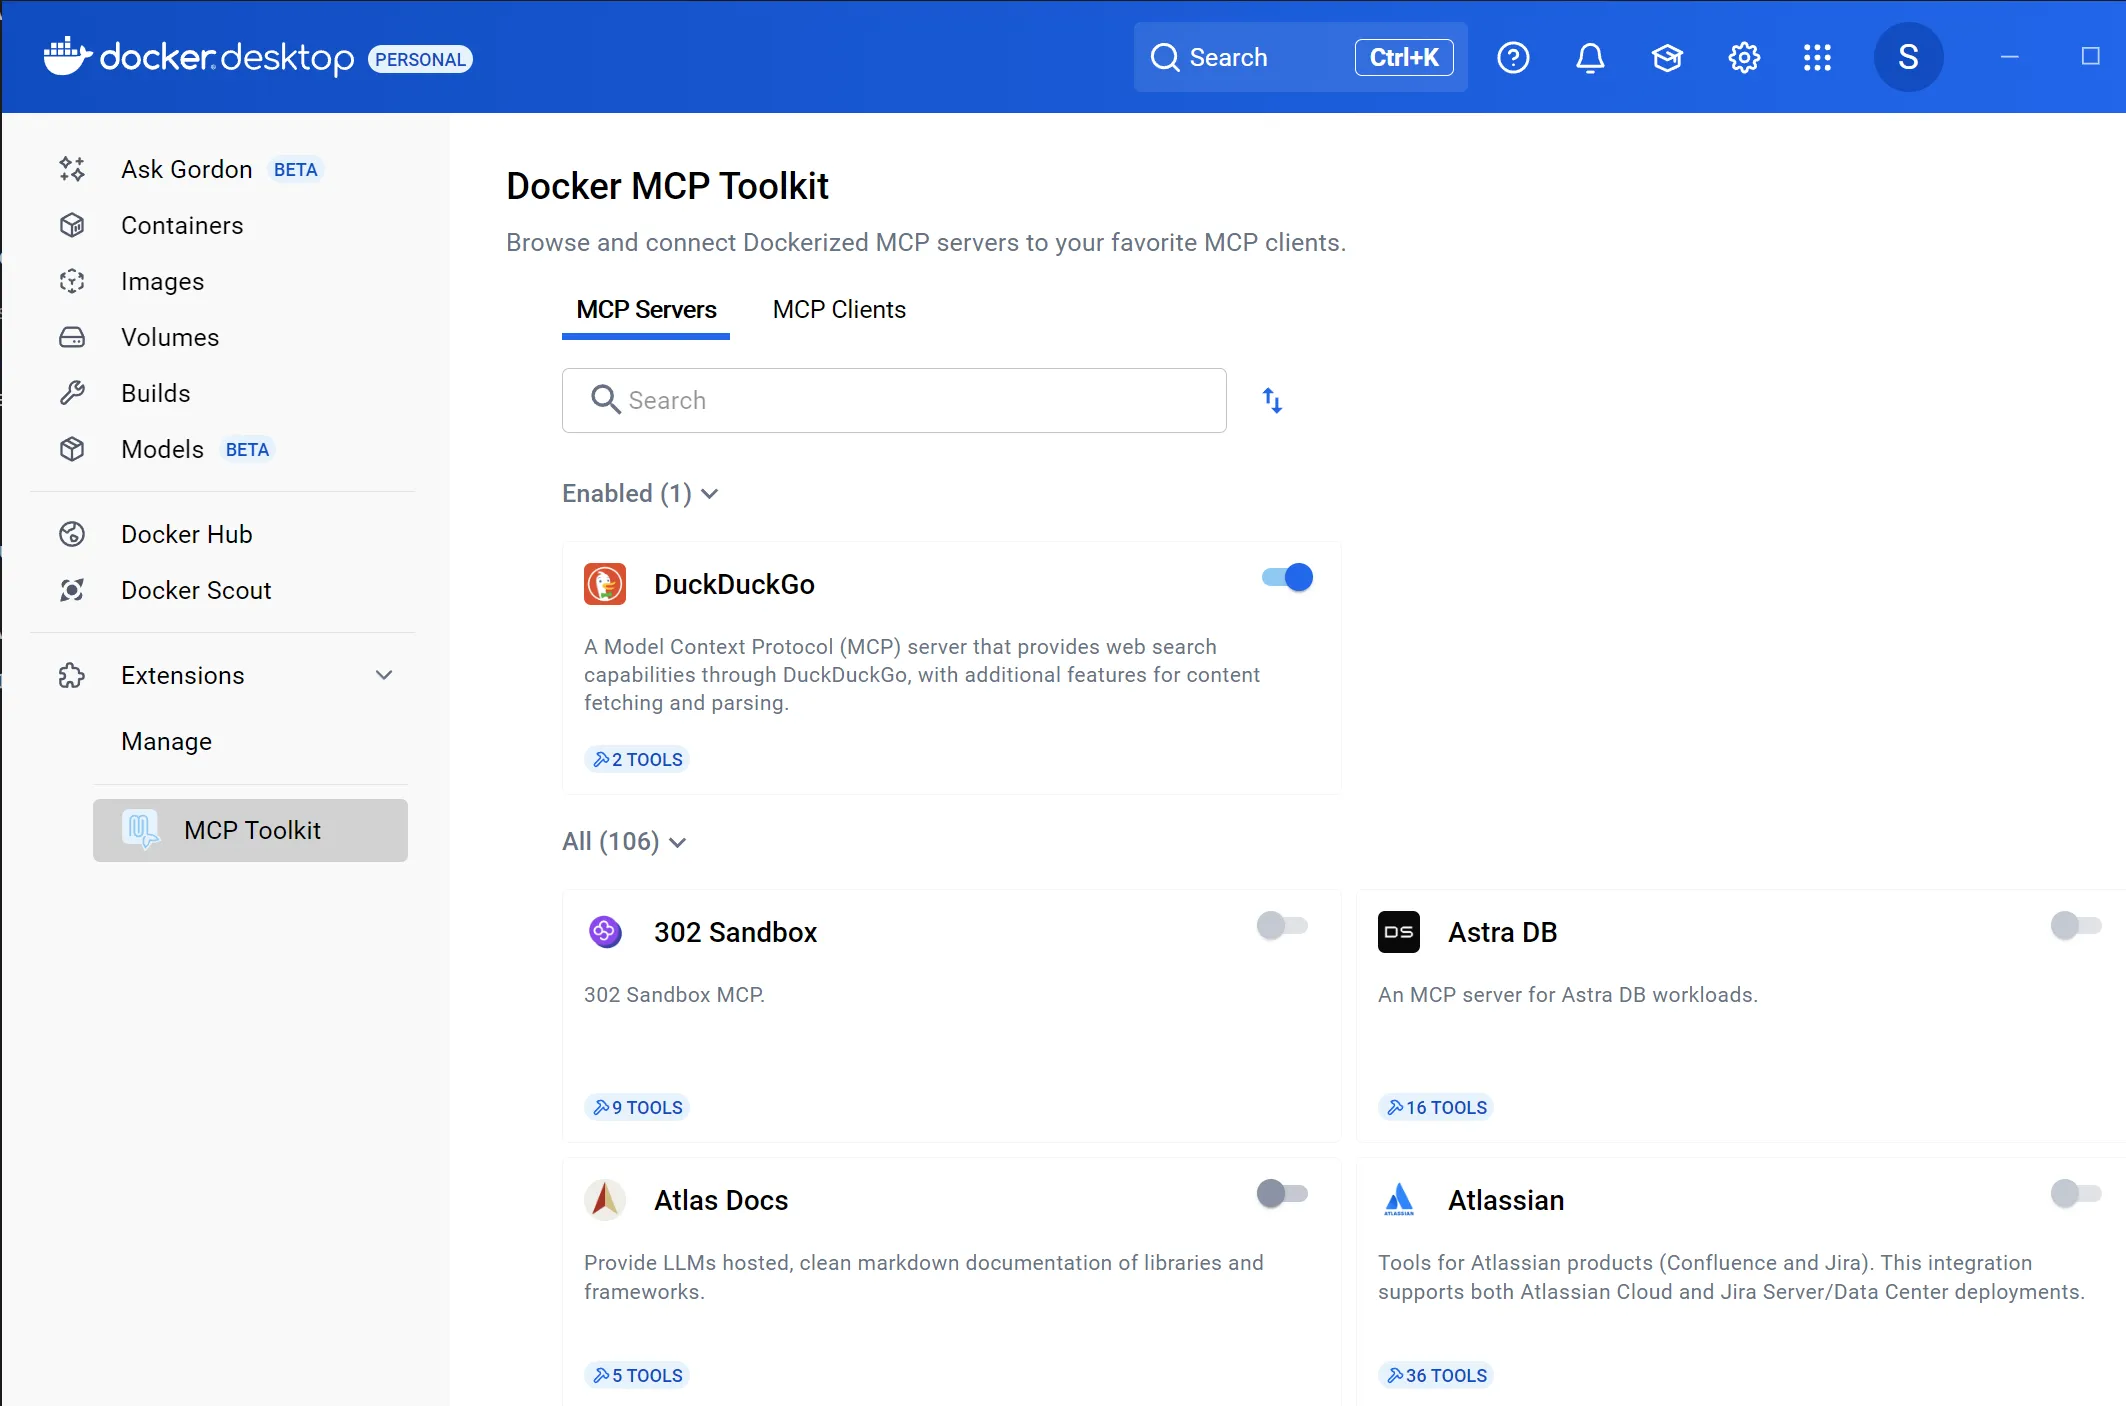
- In Docker Desktop, open the MCP Toolkit from the sidebar.
- Go to the Catalog tab to browse available MCP servers.
- Turn on (checkbox) to add a server (e.g., DuckDuckGo, Slack, Discord, Web API, etc.). In my example I have enabled DuckDuckGo .
- If required, configure the server in the Config tab (e.g., add tokens or credentials).
Example: Use the DuckDuckGo MCP Server
- In the Catalog, find the DuckDuckGo server and add it.
- If needed, configure the server in the Config tab. ( DuckDuckGo has no extra config)
- In the Clients tab, ensure your preferred client (e.g., Claude Desktop) is connected. In our example we will be using this server from python code and connecting to PydanticAI so keep reading.
- You can now send search or information requests to DuckDuckGo through your client, powered by the MCP server.
3. Define Your Agent with PydanticAI
Create a Python file for your agent. Even tough the usage of schemas is optional, to me is quite important feature, so i am including in article. Use Pydantic to define the input/output schemas:
Defining Rich Agent Schemas with Pydantic
Pydantic allows you to define complex, type-safe schemas for your agent’s inputs and outputs. This ensures that all data exchanged with your agent is validated at runtime, catching errors early and making your code more robust. Below is a more realistic example:
from pydantic import BaseModel, Field
from typing import List, Optional

class AgentInput(BaseModel):
    crop: str = Field(..., description="The crop to analyze, e.g. 'wheat'")
    location: str = Field(..., description="Geographical location, e.g. 'Iowa, USA'")
    planting_dates: List[str] = Field(..., description="List of possible planting dates")
    soil_ph: Optional[float] = Field(None, description="Measured soil pH value")

class AgentOutput(BaseModel):
    recommended_date: str
    expected_yield: float
    notes: Optional[str]
How Pydantic Validation Works:
- When you instantiate these models, Pydantic automatically checks types and required fields.
- If the input data is missing a required field or has the wrong type, a clear validation error is raised.
- This makes your agent interface reliable and self-documenting, and helps prevent subtle bugs.
For example, if you try to create an AgentInput without a crop or with a non-numeric soil_ph, Pydantic will immediately raise an error, ensuring only valid data reaches your agent logic.
4. Registering with PydanticAI
Below is a practical example of how to connect your Python agent to an MCP server running in Docker. This approach uses the MCPServerStdio class to bridge your agent with the Dockerized MCP server, and demonstrates how to securely load your OpenAI API key from environment variables:
server = MCPServerStdio(
    "docker",
    args=["run", "-i", "--rm", "alpine/socat", "STDIO", "TCP:host.docker.internal:8811"]
)

agent = Agent(
    model="openai:gpt-4.1-mini",
    mcp_servers=[server],
    input_schema=AgentInput,
    output_schema=AgentOutput,
    system_prompt='Be a helpful agent that can answer questions about agriculture and crop planting.'
)
This code snippet demonstrates how to:
- Use Docker to run a lightweight
socatcontainer that bridges standard input/output to a TCP port, connecting your local agent to the MCP server. - Instantiate an agent with a specific model and system prompt, and register the MCP server for communication.
This pattern allows you to flexibly connect your smart agent to any MCP server running in Docker, making it easy to experiment and scale with different MCP servers.
Examples of MCP Servers which you can use with 1 click
For the full and up-to-date list of available MCP servers, visit the official Docker MCP Catalog.
The MCP Toolkit supports a variety of MCP servers, making it easy to connect your smart agents to popular platforms and services. Here are five examples you can experiment with:
- DuckDuckGo MCP Server
Create agents that leverage DuckDuckGo search for information retrieval and knowledge-based tasks. - Slack MCP Server
Build agents that interact with Slack channels for notifications, chatbots, and workflow automation. - Discord MCP Server
Deploy agents to manage Discord communities, moderate content, or provide real-time information. - GitHub MCP Server
Integrate agents with GitHub to automate repository management, issue tracking, and code reviews. - Web API MCP Server
Connect agents to any web API, enabling integration with countless online services and data sources.
These servers can be easily managed and deployed through the MCP Toolkit UI, allowing you to quickly prototype and scale your smart agent solutions.
Conclusion
By combining the MCP Toolkit for Docker Desktop with PydanticAI, you can rapidly prototype, validate, and deploy smart agents that have already existing tool requirements. This approach ensures reliability, scalability, and developer productivity.