Imagine the following scenario: you are scrapping using BeautifulSoup and you use the get_text(), depending on what site you are on, you will probably get a lot of noise and a lot of non-related text. The standard best practice here is to per-website analyze the ‘selectors’ and make specific choices of tags and/or selector to include. This is off course very good if you are going to work only with a couple of well pre-defined websites. What if you do not know which website will be? or the list is very big to cover?
In some contexts,for example when scraping some content related to news or to some technical blog, you might have some previous information that will become very useful in this process.
To use an example that we all know, normally a news link will have 2 pieces of info : {url,title}
And the ‘title’ actually is quite useful to basically use it to “classify” what text is more or less related to that title.
This will will clean and remove all noise quite effectively.
We can use the ‘title’ to identify the “related” sentences and exclude the non-related ones (a classical ML classification problem)
Off course this “effectiveness” depends on your use-case, but this is meant as generic guide for using LLMs for very small specific tasks.
In future article this will become a cleaning agent 😊
Passing an HTML directly to an LLM is totally fine (see my other article ScrapeGraphAI ) BUT you will need a huge context length only possible with hosted LLM providers. Also since there is a correlation between cost an input tokens, passing a huge request for a simpler task might be overkilling.
Below we will see an example of how to setup and configure your local LLM and what example prompt i’ve used and their result.
Steps to get this working
Step #1 : install LM Studio (or Ollama)
Check this article for some basic comparison between them, and you can skip this step if you already have done this.
Step #2 : download model
The best model for my use case (this task) was Qwen2.5 Coder 7B Q4_K_M.
At the moment of writing I am still testing other ones so this is not a definite answer. My criteria is that I prefer Quality over speed, this is currently the one giving the best results. Again, if your criteria is speed, then probably this is not for you (again depends on your local hardware)
Step #4 : Measure your context length requirements
This is important since this will define what model to use locally . I will only show what worked on my case, you might need to test this yourself and tune it if you get “content length error”. The code below counts approximately how many token will your input consume. You can do this same count for the system prompt ( and add them together )
json_input = { 'you json with your data' }

import json
import tiktoken

def count_tokens(json_input, model="gpt-4"):
    serialized_input = json.dumps(json_input, ensure_ascii=False)

    # Load tokenizer for the specified model
    encoding = tiktoken.encoding_for_model(model)

    # Encode the serialized string and count tokens
    tokens = encoding.encode(serialized_input)
    return len(tokens)

token_count = count_tokens(json_input)
print(f"Token count: {token_count}")
in my case the output was : Token count: 3608
Note: you also need to count here the system prompt and your response before you use this number as content length.
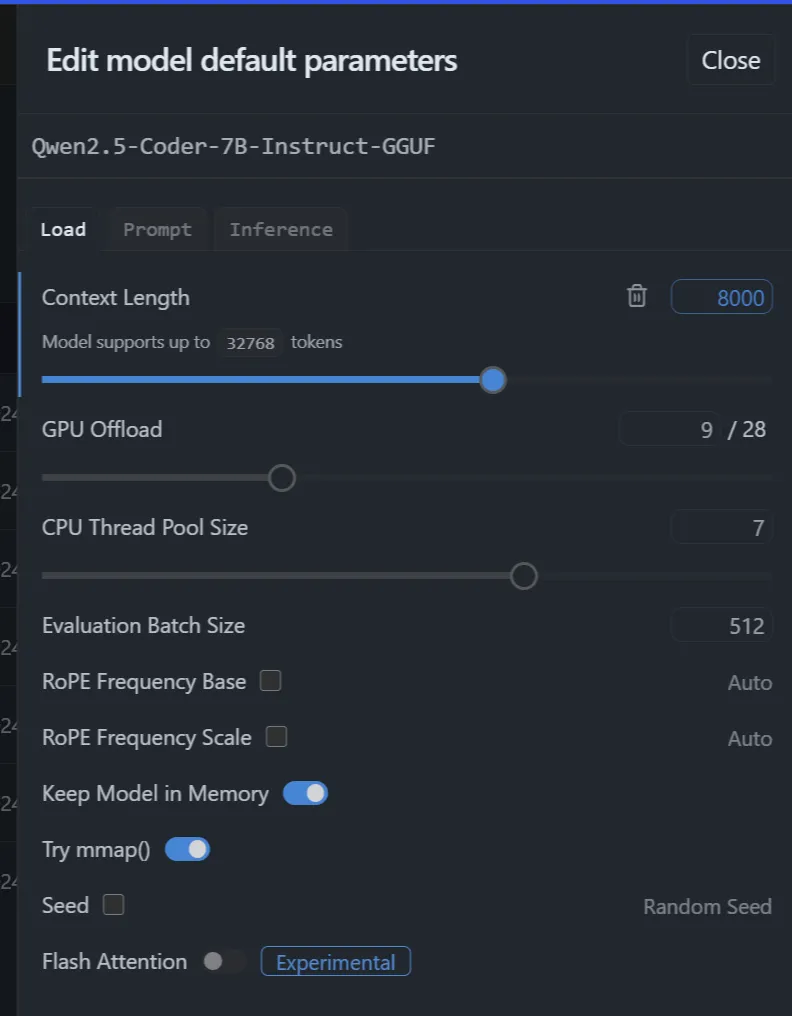
Step #3 : Configure/Extend the “context length”
LM Studio allows you to load the model with some pre-configuration. The default contact length of most models is not enough for this task.
There you can configure the “Content Length” which I have set to 8000. In my use case my response will be more or less as the same size as the input, since we are asking to classify in 2 buckets.
Step #4 : Define your system prompt
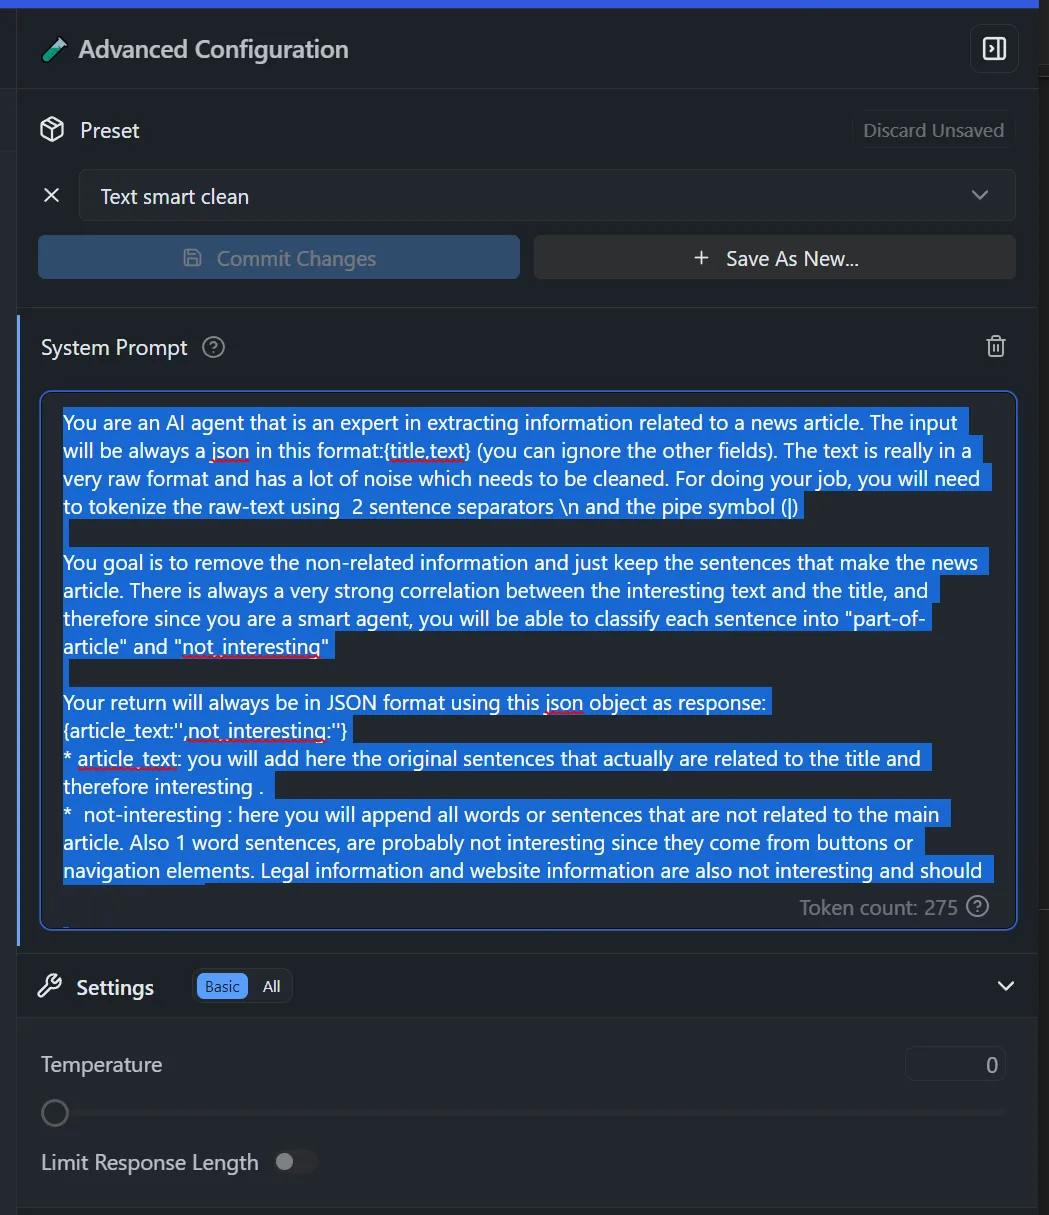
Just this simple prompt works fine:
“You are an AI agent that is an expert in extracting information related to a news article. The input will be always a json in this format:{title,text} (you can ignore the other fields). The text is really in a very raw format and has a lot of noise which needs to be cleaned. For doing your job, you will need to tokenize the raw-text using 2 sentence separators \n and the pipe symbol (|)
You goal is to remove the non-related information and just keep the sentences that make the news article. There is always a very strong correlation between the interesting text and the title, and therefore since you are a smart agent, you will be able to classify each sentence into “part-of-article” and “not_interesting”
Your return will always be in JSON format using this json object as response:{article_text:”,not_interesting:”}
- article_text: you will add here the original sentences that actually are rela
- not-interesting : here you will append all words or sentences that are not related to the main article. Also 1 word sentences, are probably not interesting since they come from buttons or navigation elements. Legal information and website information are also not interesting and should be here listed.
You will not invent or add any other sentences than the ones present in the raw-text.”
Example in LM Studio:
Step #5 : Test first in cloud model
I find always a good idea to do some test cases against gtp-4o (or any other model that you find smart ). I use this as a quality base-line for comparing local models.
Step #6: Test locally directly on the LM studio chat.
Now that you have the system prompt acting like a smart agent, so can just post a json with 2 inputs :
{
  "title": "Your Title, a sentence that represent the content",
  "text": "your long text obtained via get_text()"
}
And the output will be
{
  "article_text": " the text you really wanted in the 1st place",
  "not_interesting": "text you probably can discard"
}
Note: For debugging purposes I am returning the 'not_interesting' property, but can be left out later in the process. It's useful for debugging and tweaking the prompt
References
Want to know more?
Book a meeting with me via Calendly or contact us!